I have been using Xubuntu 17.10 for a few months. I like it because it does not consume a lot of RAM (as opposed to running Gnome 3 or KDE 5 Plasma). With 700 MB allocated memory, it runs snappy enough. Lately, I kept on checking the amount of RAM I had left on the VM, and seeing that 400 MB (sometimes more) being used by the desktop environment (XFCE), the thought of having 400 MB wasted on DE alone did not sit well with my minimalist philosophy. After all, I was using Xubuntu just because I wanted to run a number of applications that would run really well on a linux system (e.g. Emacs with Spacemacs kit, Imagemagick, etc).
What about just running headless without all the fun stuff?
And I did give that thought a try. Today, I do not regret that decision. I downloaded Ubuntu 17.10 headless server, ran the installation, enabled ssh daemon, and started tinkering for the best setup. Oh by the way, I am using Oracle VM VirtualBox Manager, not Windows Hyper-V.
I divide this note into three main sections, namely:
- Network Interfaces. I prefer using NAT plus Host-only Adapter setup instead of Bridged Adapter.
- Terminal on Browser with wetty, because most consoles on Windows suck.
- Forwarding X11 session. The fun part.
If you were to ask why I did not just go with Ubuntu WSL (Windows 10), the answers are (1) it is painfully slow for some reasons, (2) WSL runs on an older Ubuntu version, (3) I felt like I did not have much control over it. Why I did not go with Arch linux? Well, Arch is too bleedy. I just want to have a peaceful (and somewhat boring) life.
Network Interfaces
In the past I went with bridged adapter exclusively with Arya Hendriks (the codename for my previous Xubuntu 17.10 VM installation), but that setup had a network problem to which I already attempted a successful workaround (which I wrote here). Somehow I could not use bridged adapter with Fiona Hendriks (the codename for my current Ubuntu 17.10 headless installation). I resorted to a different setup: 2 interfaces. The first interface is NAT (connects the VM to the outside world) and the second interface is Host-Only (for host to access the VM).
This setup requires 2 separate configuration steps: on the VirtualBox itself and telling the guest OS to use both interfaces.
Configuring VirtualBox. There are 2 parts to this: (a) configuring the adapter with VirtualBox’s Host Network Manager (shortcut: ctrl + w), and (b) configuring the virtual machine so that it can use both adapters, one is NAT and the other one is Host-only Adapter.
 Part 1: Configure gateway and DHCP server (GIF).
Under the Host Network Manager, choose the IP for gateway or leave the default value (192.168.56.1). Since I planned to let my VM to have a static IP under the Host-only Adapter, I turned off the DHCP server for this network.
 Part 2: Let our VM to have 2 adapters (GIF).
As for my VM network settings, I enabled Adapter 1 (for NAT) and Adapter 2 (for Host-only Adapter).
That is all here and the VM was ready to be booted up.
Netplan with 2 Interfaces. The latest versions of Ubuntu (as of writing) makes it easier to configure network interfaces. Previously, one had to tinker with the /etc/network/interfaces configuration file and the directives kind of confusing. Starting with Ubuntu 17.10 (if I recall correctly), Ubuntu manages network interfaces with netplan that takes configuration from /etc/netplan/*.yaml. This is convenient because the YAML formatting is easier for mortal eyes.
Before that, let’s query how many interfaces we actually have. We should expect 2 interfaces with ifconfig -a command. On my setup, the enp0s3 was the NAT and it was already running. The second interface, enp0s8 had to be activated. To bring the enp0s8 adapter up, I ran:
$ sudo ifconfig enp0s8 192.168.56.101 netmask 255.255.255.0 up
Using ifconfig -a again would say that the interface enp0s8 now up and running. I had my default 01-netcfg.yaml inside my /etc/netplan directory for the network configuration. I simply added another entry for enp0s8 under the ethernets as shown below. Because I was assigning the enp0s8 with a static IP of 192.168.56.101, the dhcp4 directive was set to no.
# This file describes the network interfaces available on your system
# For more information, see netplan(5).
network:
  version: 2
  renderer: networkd
  ethernets:
    enp0s3:
      dhcp4: yes
    enp0s8:
      dhcp4: no
      addresses: [192.168.56.101/24]
This configuration was applied with sudo netplan apply and the system was restarted. This new setting should persist.
Wetty Web TTY
Before I installed PuTTY (to connect to my VM through SSH on Windows 10 host), I had this idea to find a web-based TTY terminal that I could use. I had no specific reason other than the thought to use web browser because that would be convenient. So I found wetty, which is a node package that can be installed and run as a service pretty easily.
I cloned wetty’s git repository into ~/script/wetty, installed dependencies with npm install and then gave it a go with this command (-p means port):
$ node app.js -p 3000
Then I visited 192.168.56.101:3000 and it worked! To run wetty as a systemd service, I created a unit file.
File: /lib/systemd/system/wetty.service.
[Unit]
Description=Wetty Web TTY
After=network.target

[Service]
Type=simple
User=fiona
ExecStart=/usr/bin/node /home/fiona/script/wetty/app.js -p 3000
Restart=on-failure

[Install]
WantedBy=multi-user.target
Started and enabled this unit at startup:
$ sudo systemctl start wetty.service
$ sudo systemctl enable wetty.service
Done!
X11 Forwarding
Perhaps this is the most exciting part of the setup. The main drive for me to implement the X11 forwarding so that I could forward Inkscape from Ubuntu to my macOS desktop by having XQuartz to draw the Inkscape window. Why would I do this? First, the Inkscape for macOS is inherently buggy. This setup alleviates some annoyance but it provides a better Inkscape experience (with a little bit ugly-looking interface).
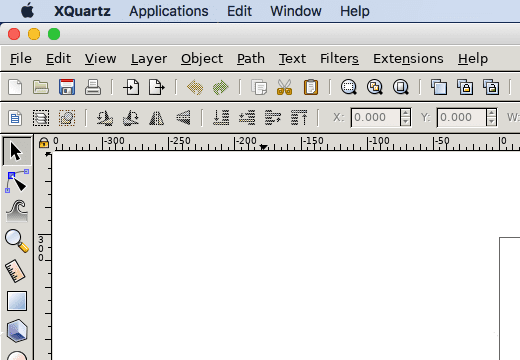 Inkscape with XQuartz on macOS.
Note: On macOS, X is handled by XQuartz. On Windows, there are a few options, notably Xming and VcXsrv. I went with VcXsrv and don’t ask me why. The setup for both is the same, so not much difference actually.
I would like to go over how I set up X11 forwarding on macOS. To summarize (before we go deeper), I employed 2 strategies: (1) execute the application within the VM directly from host terminal without SSH and (2) SSH-ing into the box first to execute the application. The latter is a lot cooler.
Execute from host’s terminal. Assuming the VM is up & running and the intended application has already been installed (e.g. Inkscape), it requires a simple SSH command to start forwarding. Ideally, XQuartz (or VcXsrv) is also running at this time.
ssh -fYC user@vm inkscape
The option -fYC is shorthand for:
-f, tellssshto go to background just before command execution.-Y, to enable trusted X11, which won’t be subjected to X11 security extension control, i.e. faster forwarding.-C, which enables compression, i.e. faster.
To make it easier, we can make an alias for this. Say, call this alias vm
alias vm='ssh -fYC user@vm'
So, any application within the VM can be called with this vm command. For example, vm inkscape or vm mkvtoolnix-gui.
Execute after ssh. There could be a situation where I would like to ssh into my VM first before running a command. During the ssh connection initialization, ssh must be run explicitly with -Y argument. Then, run any application. XQuartz (or VcXsrv) must be running for this to work.
# Connect to VM via ssh.
ssh -Y user@vm

# Execute application, e.g. Inkscape
inkscape
However with this method, the Inkscape would output messages (that we can safely ignore) in the terminal session, which won’t allow you to issue any command afterward. We can use tmux terminal multiplexer as the workaround, but there is a cooler solution: create a bash function.
function run() { nohup "$@" > /dev/null 2>&1 & disown; }
Essentially, I made a function run() that would do these:
- Run
nohupwhich makes a process immune to hangup (HUP) signal (can close terminal now). - The output from
nohupgoes to/dev/null(a bottomless pit). disownfor the shell terminal to disown that process.
Since I am running ZSH as my shell (as opposed to BASH), I place this function inside my ~/.zshrc ZSH configuration file. After refreshing the config file with source command, any application can be executed with run command.
# Execute with run() command
run inkscape
However, not all application can be forwarded. Applications like web browsers might not work properly or run very slowly. Since I am only forwarding X11 from my local VM, I will not experience any network penalty.
Network penalty is a real issue if I would like to forward an X11 session from a VPS. This is limited mainly by (1) network latency and (2) the connection speed. The further away the physical distance between VPS and my computer, that would make an X11 session runs like a snail. One workaround for this is to use faster (and less secured) ciphers, e.g. arcfour, blowfish, etc. I will not cover those here, but I have good resources: here, here, and here.
That’s all for today. If there is any question, tweet to me @aixnr.