At first, I was skeptical of the idea of peer-to-peer file synchronization. I was not sure if Syncthing could fit my use case because the notion of peer-to-peer sync was a little alien to me, as opposed to file synchronization with central server system, as offered by NextCloud, Seafile, etc.
After taming my skepticism by reading more what Syncthing offers and how people use it, I was convinced that Syncthing could fit my use case pretty well. Its job is one and only one: sync those damn files across computers. Since it works as a peer-to-peer (P2P) system, it should work well with 2 computers that can connect to each other without a central server. For example, I work on my desktop PC at home and my Asus Zenbook at work, and both are connected to the internet, Syncthing can be used to sync files between those two computers.
Specific to my use case, however, most of the time I do not open my work laptop at home. That would complicate the process of synchronizing files between my work laptop and my home desktop PC. Since I already have a VPS (Digital Ocean) running, I could use it as an intermediate node to sync files between my work laptop and my PC.
Here is a note on how I use Syncthing to synchronize files with a VPS as an intermediate node.
Syncthing on Ubuntu 18.04 LTS
IMO, the beauty of Syncthing is that it is written in Go. Just download the binary, make it executable, place it in $PATH, and it is ready to go. No dependencies required, no additional packages needed. To get the latest version, head to its GitHub releases page, then grab the correct binary. After that just unpack it and move/copy the binary to /usr/bin
# download latest tarball as of 2018-nov-18
wget https://github.com/syncthing/syncthing/releases/download/v0.14.52/syncthing-linux-amd64-v0.14.52.tar.gz

# unpack it
tar xzvf syncthing-linux-amd64-v0.14.52.tar.gz

# copy the main binary to /usr/bin
sudo cp syncthing-linux-amd64-v0.14.52/syncthing /usr/bin/
Now, let’s see if we can actually run Syncthing or not. Sometimes, it is necessary to close the terminal first then open it again for changes to take effect. Sometimes, a simple hash -r command does the job.
I added the --no-browser flag so it does not open a browser automatically. Then, navigate to localhost:8384.
syncthing --no-browser
The tarball comes with systemd unit file so that users can enable it at startup and let the systemd to manage it (e.g. start, stop, pause, etc). What I did was I copied the syncthing@.service file to the directory /lib/systemd/system.
cd syncthing-linux-amd64-v0.14.52/etc/linux-systemd/system/
sudo cp syncthing@.service /lib/systemd/system/
And now we can use the systemctl command to start the service and enable it at startup. Note that since the systemd unit file has the character @, the user ID must be included in the command. This starts Syncthing under a specific user (i.e. the current $USER) instead of root.
sudo systemctl start syncthing@aixnr.service
sudo systemctl enable syncthing@aixnr.service
Syncthing on a remote machine
Since my VPS is also running on Ubuntu 18.04 LTS, basically the installation followed the same as installing it on my desktop. However, there is a slight twist with the firewall and the Syncthing web user interface (web UI). I decided not to expose the main web UI for the whole world to see (that would be dangerous), the next option was to use SSH tunneling so that the port 8384 on the VPS would be mapped to the port 9999 (in this case) on my local desktop.
ssh -f -L 9999:localhost:8384 machine -N
This command opens an SSH connection, the -f flag tells it to go into background before command execution, the -L flag tells it to bind port 9999 on the localhost interface to the port 8384 on the remote machine, then the command -N tells it to not execute a remote command.
For sync to happen, 2 more ports needed to be open: 22000/tcp (for sync) and 21027/udp (for discovery broadcast). On my VPS, I use the ufw to manage my firewall:
sudo ufw allow 22000/tcp
sudo ufw allow 21027/udp
To kill the tunneling on my desktop
# find the process
ps aux | grep ssh

# kill it, PID column next to $USER column
kill 9999
connecting
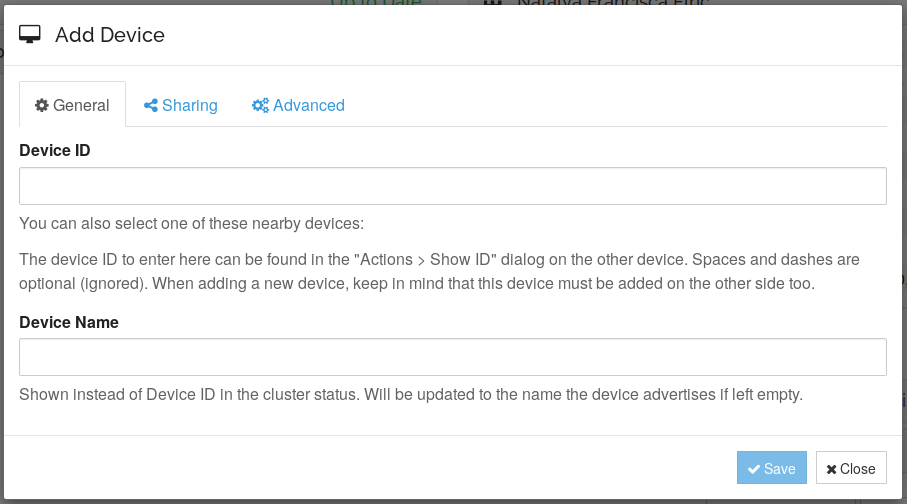
On the right-hand side of the web UI, at the “Remote Devices” section, there is a button to “Add Remote Device”. To add a device, the information that we need from the remote device is its ID, not an IP address (I am going to talk about this in a minute).
We can access the device ID by going to “Action” on the top bar, then click “Show ID”, which is going to reveal a string of characters and a QR code representing that string of characters. This process got me curious.
why Syncthing
Before we go deeper with why Syncthing, I would like to voice opinion on “why not X service from Y company”, for example, “why don’t use just use Dropbox?”. First of all, I like open source software, and Syncthing is an open source software. Secondly, if I could deploy a service on my own, I would because I like being in charge. I am currently paying $5/month for a VPS at Digital Ocean, which also houses my personal research wiki, a codex of codes, 2 blogs, and a Syncthing intermediate node. Dropbox’s paid plan starts at $8.25/month (if billed yearly).
It is not that I hate Dropbox (or any other similar services), but since it comes with a measly 2GB space for the free plan, then jumps to 1TB for the paid plan, I think it would be a waste of space since I won’t be utilizing it to its fullest extent.
But then, there are still other alternatives as well like NextCloud, Pydio, or Seafile? I went with Syncthing because it is ridiculously easy install and run it, and I only need something to sync my files across devices. Syncthing does one thing, and it does it very well. Plus, it is a single-binary application. I run my blog on Hugo (single-binary Go application) and also Gogs (also a single-binary Go application).
peer-to-peer
I was curious how Syncthing works behind the scene, so I did some reading how the service discovery works.
First of all, it does not run on magic. For a Syncthing instance to discover other Syncthing instances without directly using the IP address, there must be something in between that mediates the discovery. P2P network like torrent utilizes tracker, so does Syncthing.
It is called Syncthing Discovery Server.
The Syncthing project maintains a public discovery server and by default any Syncthing instance points to it. If privacy is an issue, anyone can run his/her own discovery server. I did not do this, so I got nothing to offer here, experiment-wise. But it is definitely a good thing to know this option exists.
upgrade
As far as I know, there 3 ways to upgrade to newer version of the binary. The first one is manual upgrade, i.e. literally replace the currently installed binary with the cp tool. The second way is using the web UI, but there’s a catch: only possible with correct permission setting on the binary itself.
I did the third option: by issuing the syncthing --upgrade option.
aixnr@natalya ~> syncthing --upgrade
19:49:21 INFO: Upgrade available (current "v0.14.52" < latest "v1.0.0")
19:49:23 INFO: Upgraded to "v1.0.0"
Because the /usr/bin falls under root permission, the fix is either to use sudo when issuing the upgrade command, or to place the syncthing binary somewhere else writable/accessible by normal $USER, e.g. the ~/bin, as long as that place is registered as a $PATH.