I just learned how to use IPerf3. The reason why I was interested to run IPerf3 was because I was a little bit annoyed at the constant internet speed drop at my apartment. There is already a CLI tool, speedtest-cli, but being technologically inclined I was curious if I could use my own VPS for this.
IPerf3 was the answer to my curiosity. There are 0 parts for this to work: an instance IPerf3 must be running on a server in server mode and another part is the client that sends request to the IPerf3 server (in client mode). Going back to the first mode, yes we need to have a server with SSH access (a cheap VPS works just fine) or just use a publicly available IPerf3.
Let’s start with the public IPerf3 because that’s easier.
Public IPerf3
Assuming iperf3 is installed (either brew or apt, depends on your OS) run the command iperf3 in client mode with -c and -R flags (explained below) to our target public IPserf3 server, iperf.he.net.
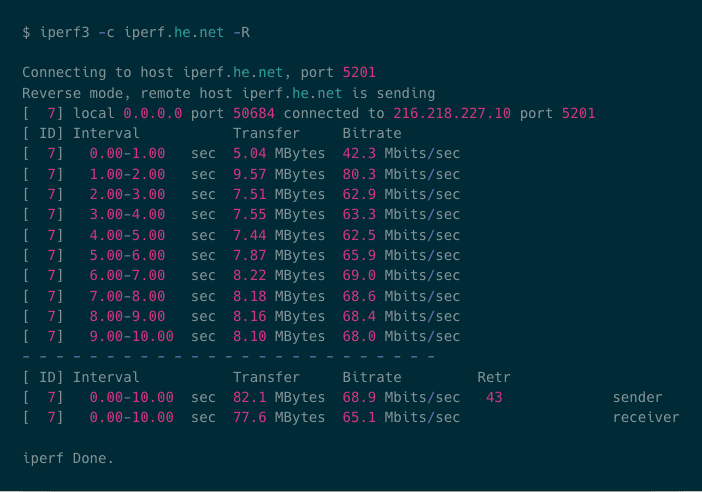 Download speed from a public IPerf3 server.
It does look a little bit busy, but we are only concerned with two information (in most cases): the last 2 lines of the output. There are 2 lines there: sender and receiver. Sender’s speed, in this case 68.9 Mbits/sec, is telling us the upload speed from the IPerf3 server to IPerf3 client. Receiver’s speed, in this case 65.1 MBits/sec, is telling us the download speed on IPerf3 client from IPerf3 server. So ideally, these 2 numbers should be in the same neighborhood.
Note that these numbers are in megabits. To get megabytes, divide them by 8 (because 1 byte has 8 bits). Hence, 65.1 MBits/sec equals to 8.14 MBytes/sec. This is the speed that you see when downloading stuff.
Private IPerf3
I have a DigitalOcean VPS in Amsterdam, protected with UFW (firewall). By default, IPerf3 runs on port 5201, hence it is necessary for this port to be unblocked.
$ sudo ufw allow 5201
$ sudo ufw status
This should open port 5201 for IPv4 and v6. By default, IPerf3 outputs to stdout in current terminal session. I went with tmux (too lazy to create a systemd-unit file).
$ tmux
$ iperf3 -s
The flag -s tells our iperf3 command to run in server mode. This flag is synonymous to --server. Now, it should be ready for any client to connect.
$ iperf3 -c 1.2.3.4 -R
The -c flag tells our iperf3 to run as client mode and to connect o the IP address of our server, for example, 1.2.3.4. The -R flag is simply telling the iperf3 to run in reverse mode. Why? Because by default without the -R flag, the client sends data to the IPerf3 server, so we would be measuring client’s upload speed instead of client’s download speed.
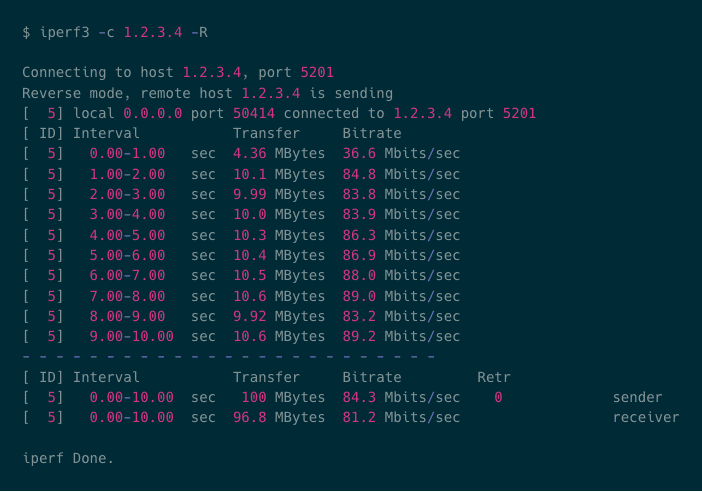 IPerf3 in reverse mode from my Amsterdam VPS.
Maybe the next mini project that I should do is write a script to get the network speed every N hours and plot them. It would be interesting to make a chart out of this data. Also, I guess I should learn other network tools to gain some more mastery in networking especially in Linux operating system.