I bumped into a limited space problem when I was installing qiime2 microbial bioinformatics package yesterday (23 April). At first, I attempted at increasing the VDI of my Ubuntu VM and we will talk why that is not the best way to do it later.
Fast forward couple of hours later, I broke my Ubuntu VM after failing to precisely allocate the free disk space coupled with over-bloating my VDI because I did not properly check its size. More on this in a second.
Finally, I trashed my Ubuntu VM and installed Arch linux from scratch. No, Ubuntu was not the problem. I was feeling great, so that is why I decided to go with Arch. I learned a few things on how to deal with partitioning and it was a fun process although it cost me big time. Thankfully, it happened on a VM.
what led me there?
Our class was assigned with a homework on microbial informatics, specifically on how to use qiime2. The first part was to get qiime2 installed, but it was not a fun process at all. This package is only available on Conda on a specific channel, hence the installation process was an involved process.
The alternative to install qiime2 is to download an official VM image. I do not like this alternative at all. First, the VM is based on Ubuntu (default, I think the DE is Unity). That would need a lot of RAM. The default RAM allocation is 2GB, so those with 4GB RAM would suffer.
It says on the page that user must have ~25 GB of free space to install qiime2 with this method. Phew, that’s quite a lot of space just for this homework.
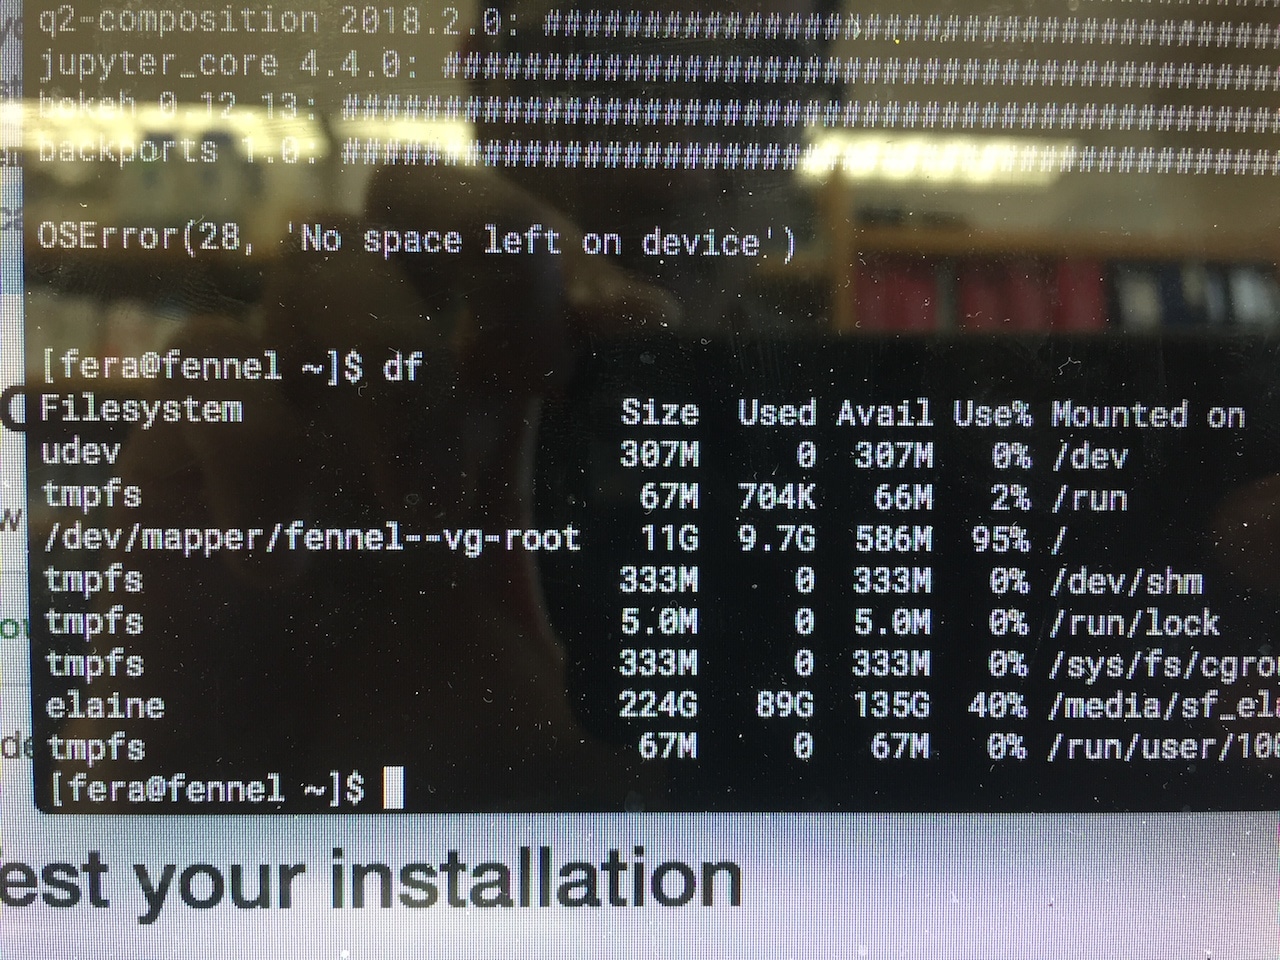
I went with Conda method and I did that on my Ubuntu VM. Here was the problem: my Ubuntu VM was allocated about 12 GB of disk space. Of course, I bumped into this problem:
I turned off the VM. On the macOS host, I issued this command:
VBoxManage modifyhd --resize 25600 ~/path/to/disk.vdi
25 GB is 25 * 1024 = 25600. The command worked and I ran zerofree (as explained here), except I forgot that it did not stop there. The next step is to resize the filesystem to obtain the new space, but I forgot that step.
As the result, I ran the installation again and bumped into the same error. I repeated the modifyhd command. Lo and behold, when I gave a thorough check the VDI virtual size ballooned into 120 GB ("wait why it did that?").
After realizing that stupid mistake, I tried to fix the situation. It was the first time I tried manipulating LVM and it was a spectacular blunder.
So a note to myself: when trying to increase the size of a partition and if the OS is running on LVM, don’t increase the size by using modifyhd directly on the VDI the OS is running on. That’s an ugly solution. Instead, create a new VDI and extend the current LVM Volume Group (VG) to use that VDI.
And here is how it should be done. I will let you know why later.
a new VDI, the same old VG
I assume that you already know LVM is (which stands for Logical Volume Management), what it does, what problem it solves, and what problems it could create. I also assume that you are familiar with the terminologies like PV (physical volume), VG (volume group), LV (logical volume), and FS (filesystem). Here is a link to Arch’s wiki and here’s a link to How-To-Geek.
Briefly, PV can be an HDD device or a partition on an HDD device; VG is a unified pool to combine multiple HDD devices or partitions together; LV is the logical layer that uses this pool; FS is the filesystem (e.g. ext4) that lives on top of an LV, which an operating system can work on.
Overview:
- Create a new VDI. This will be the
/dev/sdb. - Create a Linux partition on this VDI with
cfdisk. - Give this partition to LVM with
pvcreatecommand. - Tell the current VG to extend into this new LVM partition.
- Extend the current Logical Volume (LV).
- Resize the current File System to use all available LV.
This process is laborious. All data should backed up before proceeding. Regardless, all data should be backed up because nature is always conspiring against us.
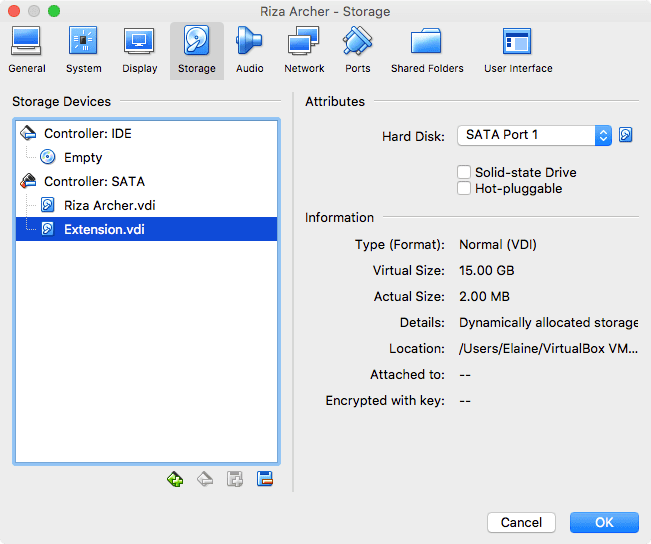
On the macOS host, the first step I took was to create a new VDI, which ultimately going to be the /dev/sdb. Let’s call this new VDI as Extension.vdi.
The OS should be able to recognize the drive after booting up. A quick check with lsblk is a good start.
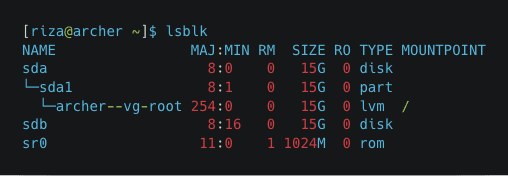
See that this /dev/sdb is there and ready to be used. Then, proceed with cfdisk to create a Linux partition. Note that the LVM pvcreate can take the whole disk even if it is unpartitioned, but I read on the internet that it is somewhat better to partition it first.
For those who are a little anxious about using text-based partitioner, you guys can boot up GParted instead. I went with GParted first before when I was a little uncomfortable with cfdisk, but now I kind of get the hang of it.
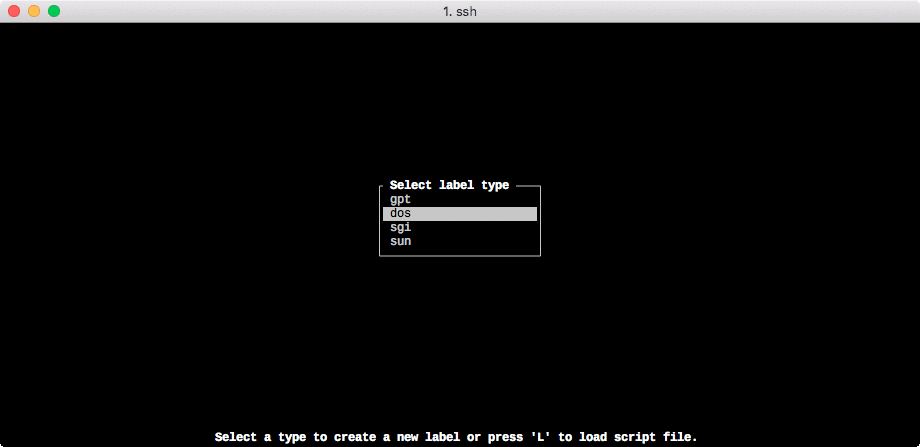
Here are the options that I entered:
- Label type: DOS (a.k.a MBR)
- New partition, use 15 GB (all of them)
- As primary (does not matter)
- Partition type 8e (LVM)
Here is a nice GIF that I made to illustrate the process of creating a new partition from a new HDD device, starting from typing sudo cfdisk /dev/sdb. The Select label type is the first screen.
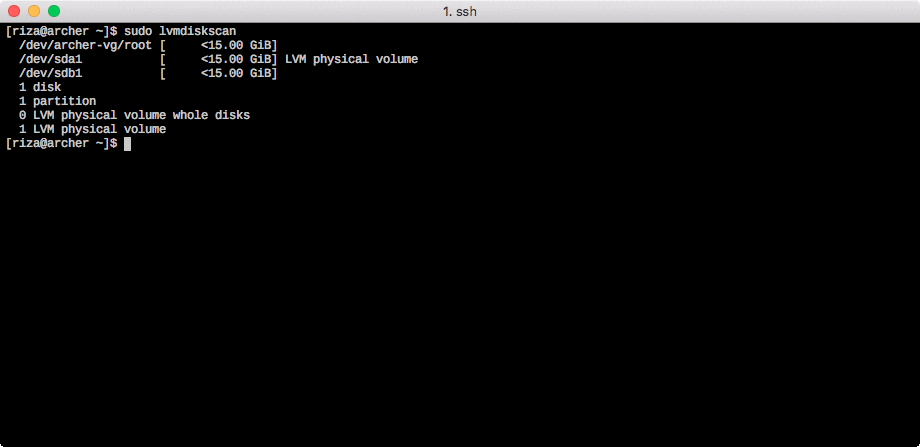
After this is done, a new partition /dev/sdb1 (note the number) is available and this is where the process that involves LVM starts. Here are the commands that I ran. Note that I only have one LV and that is root that lives inside the archer-vg VG.
# scan all disk
sudo lvmdiskscan

# pvcreate to create a PV
sudo pvcreate /dev/sdb1

# extend VG archer-vg
sudo vgextend archer-vg /dev/sdb1

# extend the root LV
sudo lvresize -l +100%FREE /dev/archer-vg/root

# resize the FS
sudo resize2fs /dev/archer-vg/root
Here is a GIF for this process starting from issuing the sudo lvmdiskscan command.
why not just increase the size?
“So, why don’t you just increase the size of
/dev/sda1like you first did withmodifyhd?”
Excellent question. There are two reasons for this. First, if there is an absolutely demanding alternative available, that is the best way to do it because we learn more from doing that. Secondly, because with complexity often it is bundled together with modularity.
The goal for my purpose was not to permanently increase the size of /dev/sda, but I wanted a temporary increase on the root partition so that I could install qiime2. Once the homework was done and dusted, the extra space would be released with a relative ease.
I have not done this yet, but this is the idea: shrink the size of FS and then shrink the size of LV. If everything went right with no problem (e.g. no need to run pvmove), in theory /dev/sdb1 could now be ejected from the VG archer-vg with vgreduce (or in some cases with pvremove) command.