Usually, I edit documents or (config) files on my remote VPS with vim over ssh. It would be nice to be able to edit some files through web browser. With the arrival of JupyterLab, I contemplated the idea of using Lab as a pseudo file manager with text-editing capability. I tried it and I kind of liked it.
Here’s how I do it. First and foremost, make sure pip3 is installed on the remote VPS machine. Then run:
pip3 install --user jupyterlab
Note: I like using the --user argument because I like having my pip3 packages installed locally to my $USER. It will install pip3 packages/binaries in ~/.local/bin.
From here, we have 2 options: use SSH tunneling to access the remote JupyterLab or configure JupyterLab to serve globally.
Option 1: SSH Tunneling
Perhaps, the most secure method. First, let’s run our JupyterLab on the VPS. By default, JupyterLab opens a browser after the command execution. Add the --no-browser (do I need to do this on VPS, btw?).
jupyter lab --no-browser
The command will return a link plus token authentication key with the address begins with http://localhost:8888. This means the JupyterLab instance is running and accessible only through localhost at port 8888. Now, let’s go back to our local machine and run this command to start tunneling.
ssh -N -f -L localhost:8888:localhost:8888 name@server1
I tried running this command with -q option so that it will suppress all warnings. However, my terminal returns Bad local forwarding specification. Welp. Why would anyone run it with -q option? Because once you terminated the JupyterLab instance on VPS, your local terminal will spit out warnings. It is kind of annoying that you need to invoke killall ssh to kill all SSH sessions.
Now, supposedly we should be able to just type localhost:8888 into our local browser. If it works, Jupyter Lab would ask for password or token. Now, copy & paste the link with token authentication that you encountered before when starting up a JupyterLab instance on VPS and paste it into your local browser.
It should work.
Option 2: Run JupyterLab globally
Simply run:
jupyter lab --no-browser --ip=0.0.0.0
In theory, this JupyterLab instance would be accessible with the domain name or IP address assigned to your VPS. Bear in mind that if your domain name is secured by CloudFlare CDN proxy, port 8888 would not be accessible. Change to something else, like port 8880. If you have UFW active and running, enable the appropriate port(s).
jupyter lab --no-browser --ip=0.0.0.0 --port=8880
sudo ufw allow 8880
Now it should be okay.
Use Cases
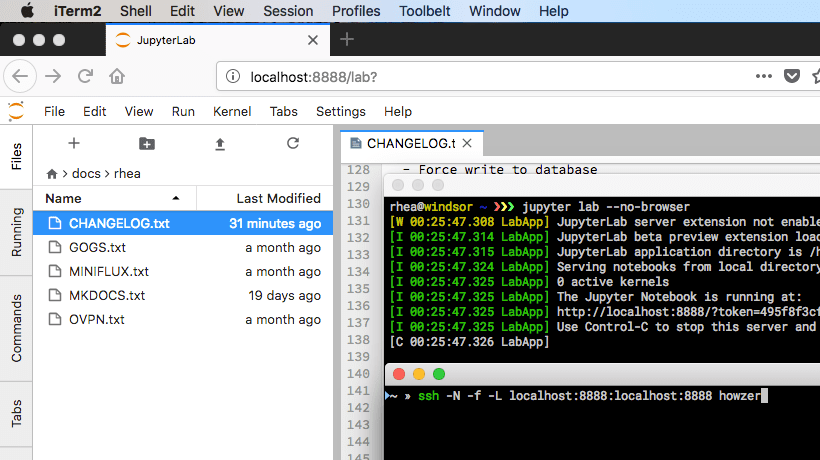 JupyterLab through SSH tunneling.
I frequently spin up Docker instances on my VPS, to which I need to write or copy-paste docker-compose.yml files. I find it is easier to do it with JupyterLab as my text editor as opposed to using vim. Somehow, it feels snappier here. Other than that, I maintain several files detailing changes I make on my VPS (refer to the picture above) as a way to keep track of what I am doing on my VPS for future reproducibility.
By default, Jupyter Lab does not allow its file manager to get into parent directories. Meaning that if JupyterLab is invoked within $USER home directory, you can’t get into, say, /etc/ directory to change some config files over there. However, you could use a terminal within JupyterLab to any directory in your VPS just like your regular SSH session.
For my situation & current needs, this is great enough.